
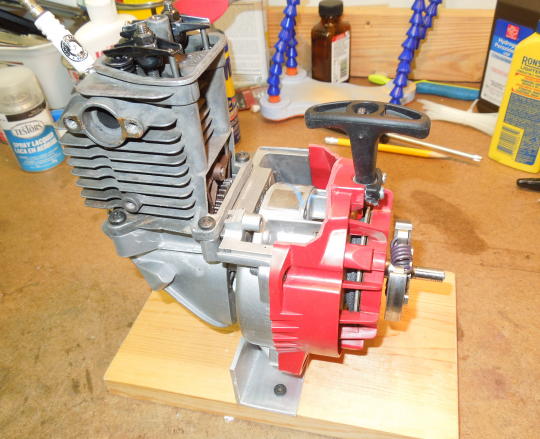
Four Stroke Engine Cutaway
--EXTERNAL LINK-- Click image to go to a brief two minute YouTube video of the finished engine cutaway.
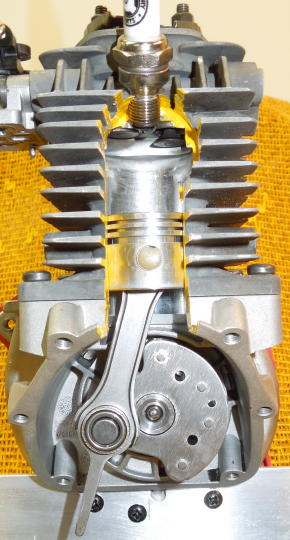
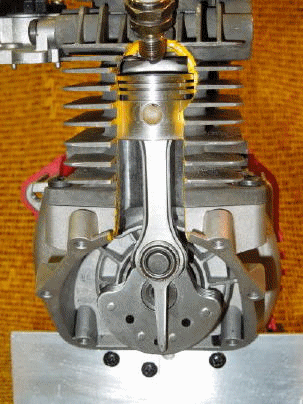
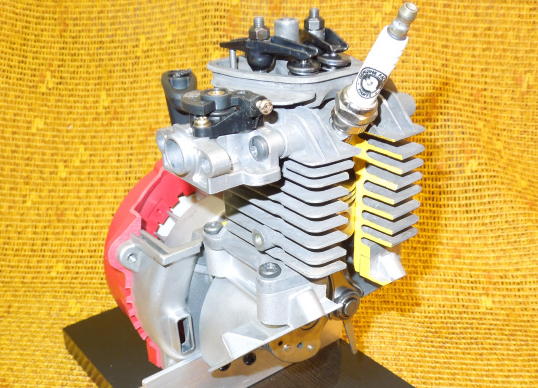
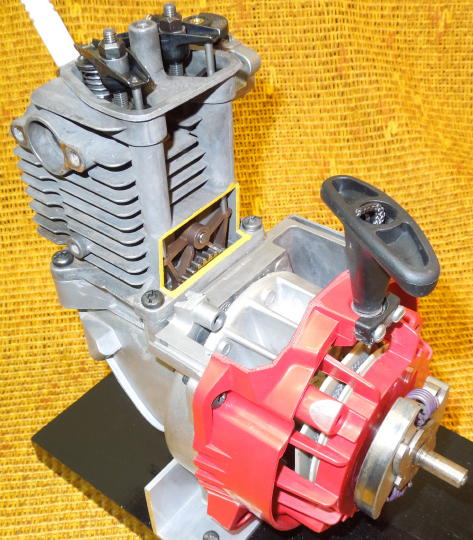
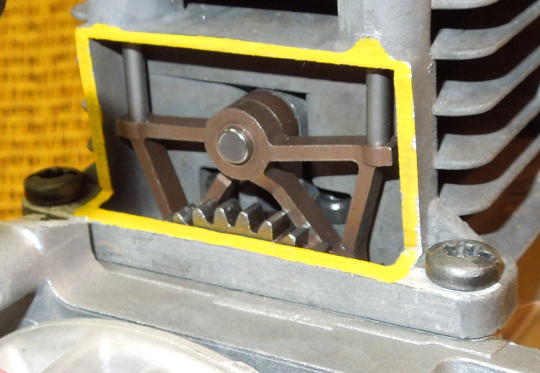
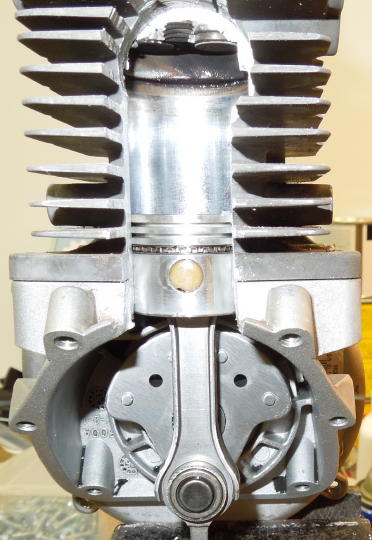
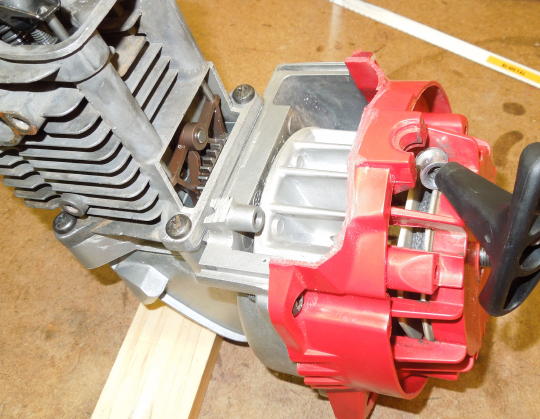
Finished cutaway.
Finished cutaway.
Finished cutaway.
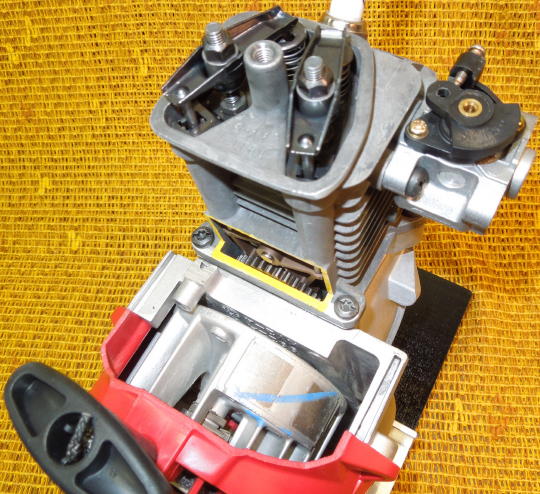
Finished cutaway.
I've always had a fascination with machinery cutaways and engine cutaways in particular. Aviation museums are a good source of engine cutaway displays. The cutaways were often built for training purposes. The greatest cutaway of all time has to be the Pratt & Whitney R-4360 Wasp Major. My project is slightly less ambitious.
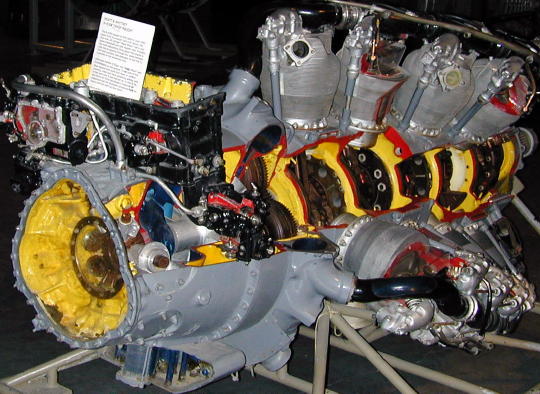
R-4360 Wasp Major Cutaway.
My cutaway started off as a small Troy-Bilt cultivator. It was never big enough to be worth while. And it was never going to run again without new fuel lines which I was never going to get around to doing. In June 2016 I decided to scrap the cultivator and make an engine cutaway. I didn't actually know anything about fabricating an engine cutaway. I just made it all up as I went. Obviously I drained away any residual gas and oil before getting started.
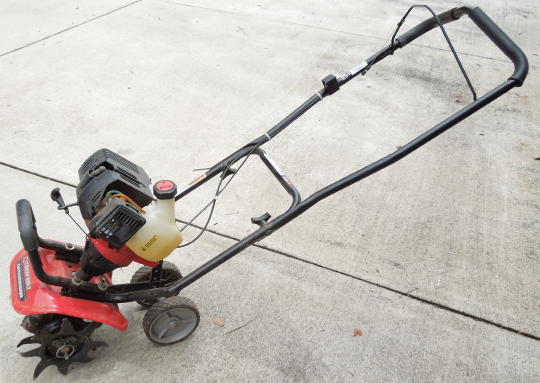
Troy-Bilt cultivator.
I scrapped away enough parts so the rest fits on my cluttered workbench.
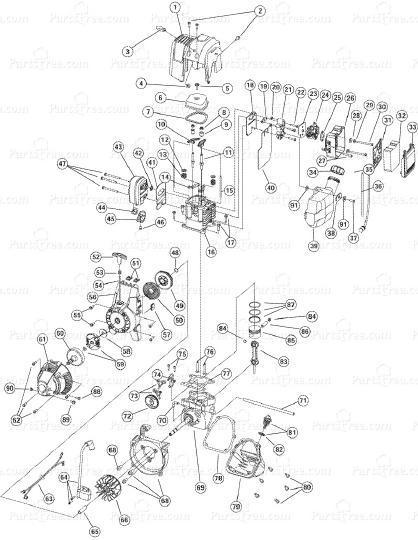
Finding a parts diagram on the Internet helps with disassembly.
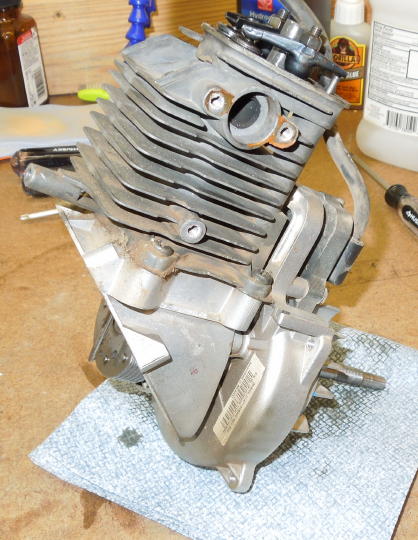
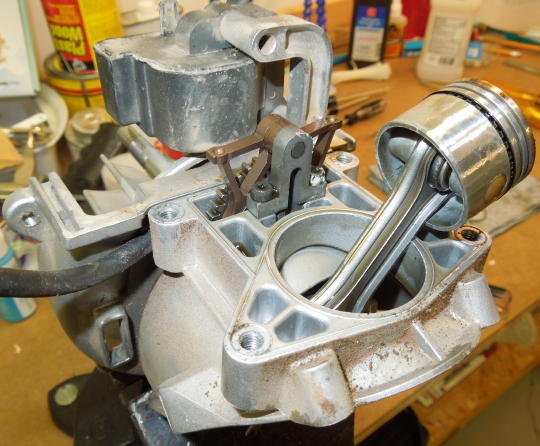
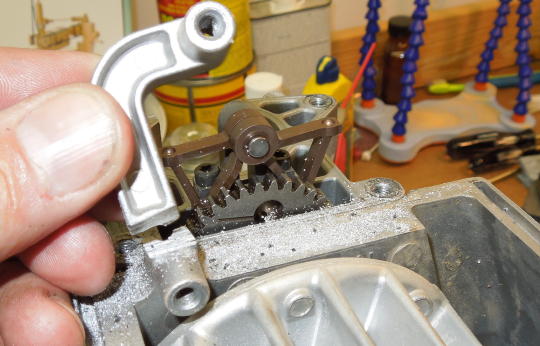
Now I'm down to a manageable chunk. Simply scrapping the valve cover and oil pan reveals many moving parts.
Cylinder removed.
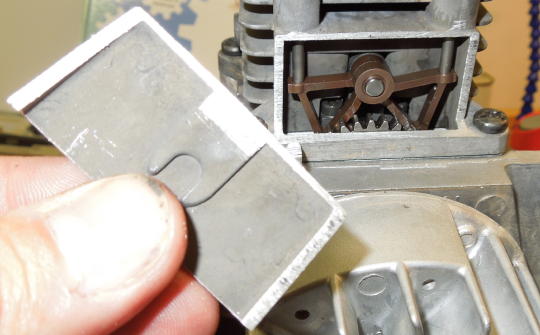
I don't really have any power metal working tools. Fortunately the cylinder and crankcase are made from aluminum. First I clamped the cylinder to my drill press and ran a hole saw through the front. I tried to cut as high as possible without removing all the sparkplug threads or damaging the valves. I went a little too high and nicked one of the valves, but it turned out okay. After each cut I took the part outside and sprayed it down with brake cleaner. The brake cleaner blasted away all the cuttings and by the time I was done I had also blasted away most of the grime, oil residue and carbon.
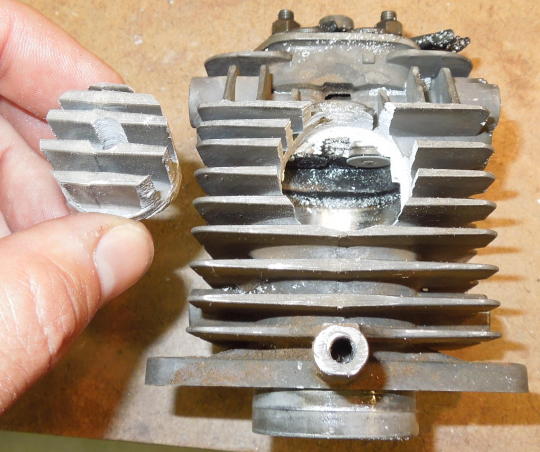
Hole saw cut through the front of the cylinder.
Next I made two vertical cuts with a hacksaw. I made most of each cut with the hacksaw, but had to finish with just the blade. Good thing the cylinder is made from aluminum. Then I reinstalled the cylinder and made matching cuts through the crankcase.
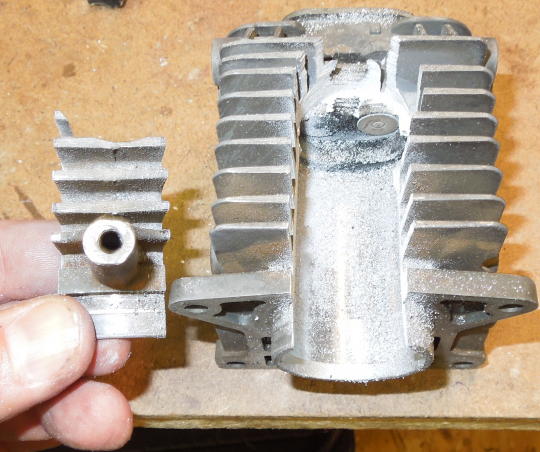
Vertical cuts through the cylinder.
Matching cuts throught the crankcase.
Finished front cuts.
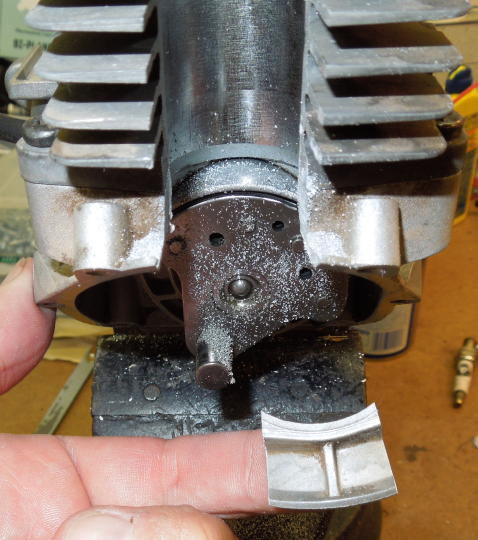
Next I wanted to cut out the back of the cylinder to reveal the cam gear and cam followers. But the ignition module was in the way so that went too. These were all easy hack saw cuts.
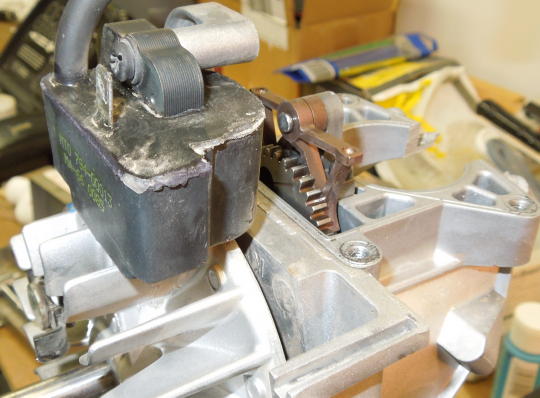
Ignition module in the way.
Ignition module mounting arm removed.
Back of the cylinder removed.
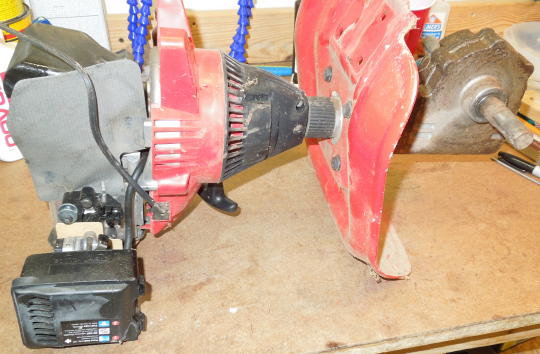
I planned to power my engine cutaway with the original starter assembly. But it was too big so I cut that down as well.
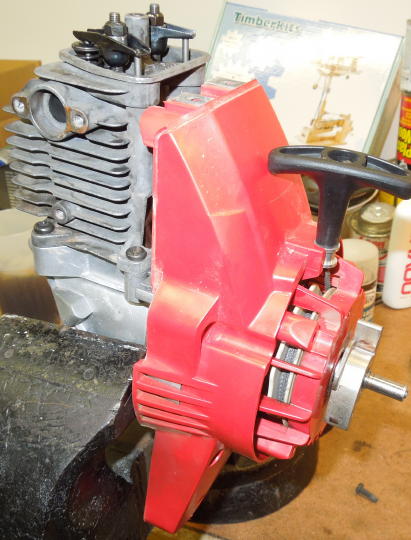
The starter assembly is too big.
That's better.
I wasn't planning to reuse the black plastic clutch cover. But I cut out the one small piece that secures the little metal rope guide. I attached it to the starter assembly with a pair of screws.
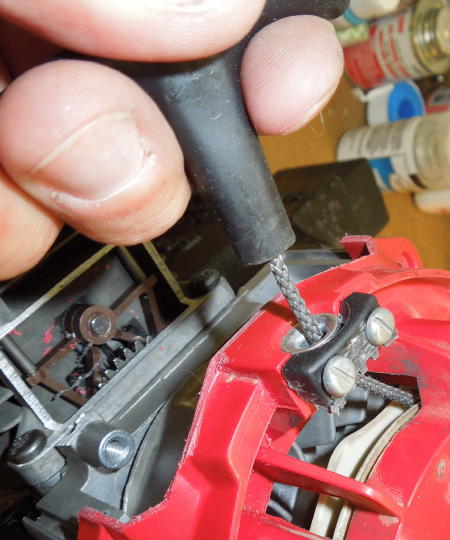
Reworked rope guide.
Next I made a display stand from a piece of aluminum angle stock and a board. I drilled and tapped the flywheel shroud for three mounting screws.
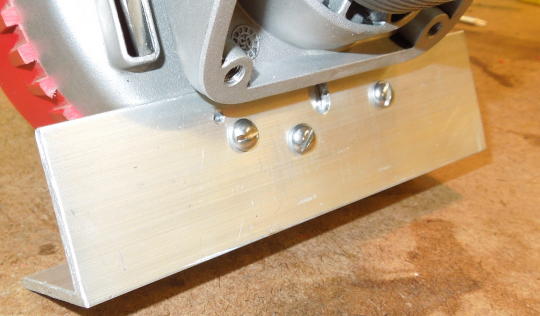
Engine mounting bracket secured to the flywheel shroud.
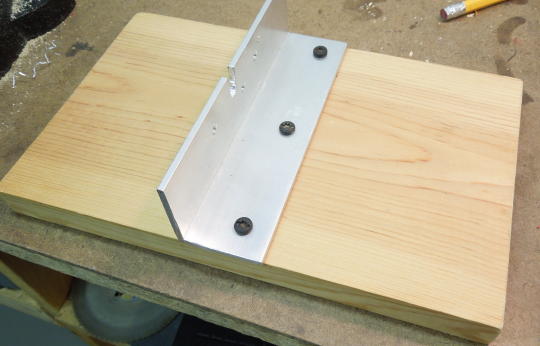
Display stand.
For decoration I reinstalled the sparkplug, part of the clutch and a piece of carburetor.
Almost done.
At this point I completely disassembled the engine again. I thoroughly cleaned all the parts. I removed all the piston rings. I highlighted my cut marks with yellow enamel. I painted the base black. I reassembled everything and the finished engine appears as shown at the top of the page.
One more modification I made was to replace the original heavy valve springs with lighter springs. I found the perfect springs in my pinball machine parts supply. The springs I used are actually for pinball machine bumper skirts. I don't plan to re-lubricate any of the engine parts. The new springs made for a lighter, more consistent motion when pulling the starter cord.
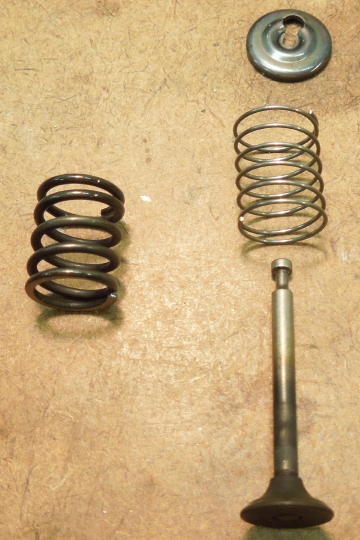
Original heavy valve spring versus a much lighter pinball spring.