Tips & Tools
Page under construction. I thought this page would be a good idea, but I never seem to get around to finishing it. Sorry.
This page is a compilation of various tips and tools (some homemade) I've used for pinball maintenance and repair that have a more universal application beyond my individual game "Repair & Maintenance Log" pages. In no particular order...
I made a pair of U-shaped blocks to fit over the side rails. I made these for my System-11 games. I can pull the playfield forward off the pivot bolts and work behind the playfield's back panel.

.
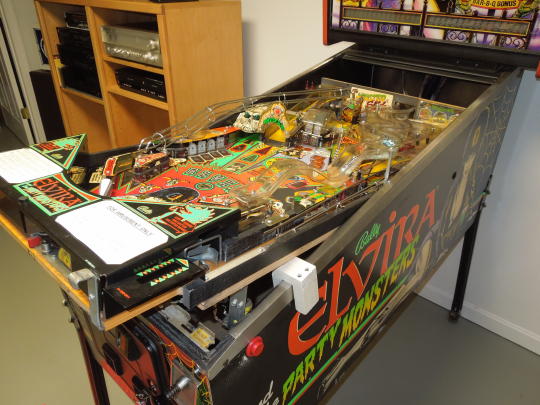
.

The blocks work for old Bally games too.

.

.
Here's another playfield trick to get those metal bumper posts. A typical ¼" nut driver won't work because the post is too fat. A typical nut driver has a tapered shaft that can't be drilled out. So I got this straight-shaft multi-bit driver that uses ¼" bits. I was going to drill it out, but in this case the shaft was already sufficiently hollow to fit right over the post.

Use a ¼" multi-bit driver to work the metal bumper posts.
Instead of "blowing" through a bunch of fuses trying to trouble shoot a problem I bought a set of circuit breakers which may be temporarily jumped in place of a fuse. They can be found at electronic or boating suppliers. Many people solder an old blown fuse across the breaker terminals such that the breaker may be popped right into the fuse clips. I took the alligator clip approach. I like that I can easily jump an ammeter into the circuit. Most people suggest that circuit breakers have a higher tolerance than fuses. So, for example, use a 3 amp breaker in place of a 4 amp fuse.

Circuit breakers for fuse testing.
I tried restoring old yellowed transparent plastics using fresh off-the-shelf 3% hydrogen peroxide. I put the parts in a Ziploc baggie with enough hydrogen peroxide to cover the parts. I put the baggie in a reflective pie pan and set it out in the sun. The parts were exposed to a total of three days of winter sun. But little additional improvement was observed after the first two days. The parts still had a slight yellow tint, but were much improved. This is a mild variation of the "Retr0brite" process which can be found on the Internet.

Treating the parts with hydrogen peroxide and sun (UV) light.
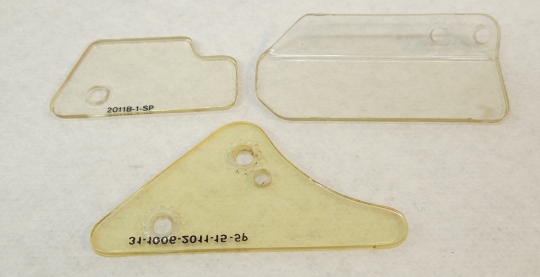
Two restored parts compared to an unrestored part.
Instead of permanently soldering some sort of remote battery setup to the CPU board I made battery place-holders from 1/2 inch dowel. This method requires no board modifications. And no connectors are needed between the board and the battery pack. The battery wires are mounted to an end of each dowel with a screw and crimp terminal. The screw head becomes the "battery terminal". Don't forget to account for the height of the screw head when figuring the length of the dowel. I wired the battery pack with 8' leads. Instead of placing the battery pack in the head, I drop it down into the body and place it next to the coin door. Opening the coin door is easier than opening the head. The idea is that I'll be better motivated to replace the batteries more often.

Battery place-holders and remote battery pack. Note the blob of silicone over the battery pack switch.
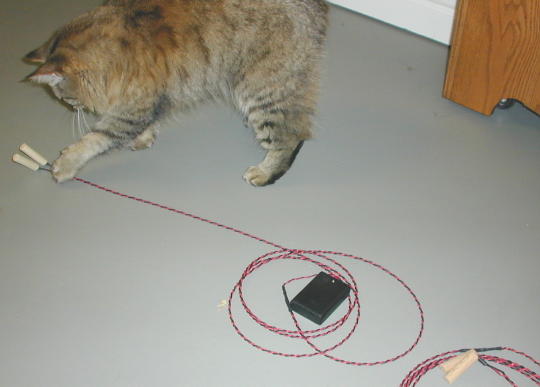
Scruffy gives each assembly a quality control check.
Here's a plastic tool I found at Home Depot for pulling large fuses. It's perfect for pulling old AA batteries and also works for digging out hard to reach pinball fuses.

Fuse puller.
After ten years of tinkering with pinball boards I finally decided to buy a board vice and an electric solder sucker. What a difference! Not having these tools is just stupid.
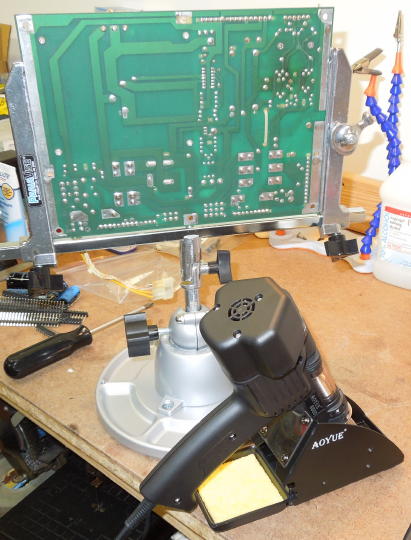
A PanaVise Work Center and an Aoyue 8800 Desoldering Gun.
I was trying to think of ways to tighten posts without using pliers. I made a pair of "handles" which were just pieces of metal scrap with a threaded hole. I tapped one handle 6-32 and one 8-32. I tightened a handle against the top of a post like a pair of jam nuts. I used a screw, but a screwdriver was unnecessary. Hand tight was plenty. The handle gave me something to hold while I tightened the under playfield nut. It didn't take much to hold the post. Nothing more than a small handle was needed. After the nut was tight the handle was backed off and removed.

Post tightening handles.

Post tightening handle.
Part of my original idea was to get at posts in tight corners. Otherwise a wingnut would work well enough for most circumstances. Instead of making a corner handle as I did, you could simply cut one wing off a wingnut. I wanted to fit multiple posts at once so I made up sets of 6-32 and 8-32 post handles.
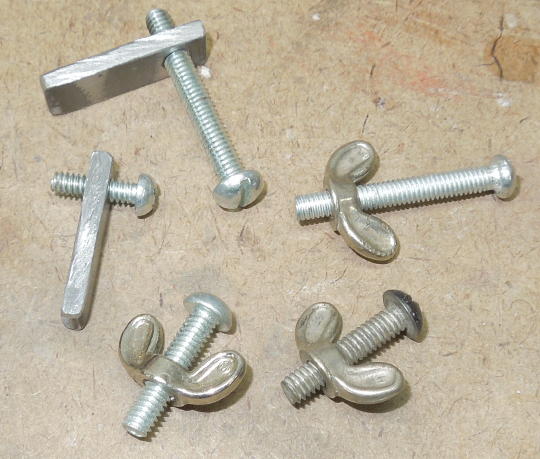
Post tightening handles.
More handles... I use a pair as long machine screws for handles when I want to run a small post against the buffing wheel.
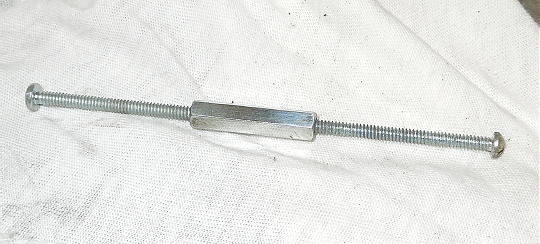
Machine screw "handles" for polishing posts.
